2024年1月31日 星期三

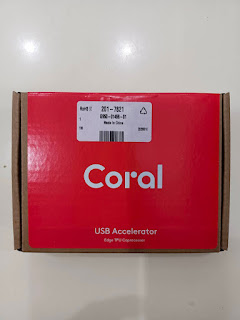
Raspberry PI4 + Coral USB Accelerator Various Applications

Purpose:
利用Raspberry PI4 + Coral USB Accelerator來學習各種Edge TPU的應用範例, 進而開發自己的專案程式.
Use Raspberry PI4 + Coral USB Accelerator to learn various Edge TPU application examples and then develop your own project programs.
Architectures:

Fundamental:
開始使用Google Coral USB Accelerator之前,須先在樹莓派上安裝Edge TPU runtime及PyCoral library。Coral官方網站中:「Get started with the USB Accelerator」針對Google Coral USB Accelerator做出一連串的介紹及設定。
介紹模型及安裝
較常使用的TensorFlow Lite的模型為「物件偵測(Object detection)」及「圖片分類(Image classification)」。而在TensorFlow官網上提供object_detection介紹,透過Video Stream與物件偵測模型結合,該模型可以判斷鏡頭前的物品並標示物品名稱。

樹莓派上開啟終端機,輸入以下指令下載Coral Edge TPU套件:
在/home/pi/google-coral/tflite/python/examples/detection/models中找到「ssd_mobilenet_v2_coco_quant_postprocess_edgetpu.tflite」模型,此模型為物件偵測所使用,/home/pi/google-coral/tflite/python/examples/detection/models中找到「coco_labels.txt」文字檔,內容包含89項物品的文字.

Image classification(影像分類)
1. Download the example code from GitHub:
mkdir coral && cd coral
git clone https://github.com/google-coral/pycoral.git
cd pycoral
2. Download the model, labels, and bird photo:
bash examples/install_requirements.sh classify_image.py
3. Run the image classifier with the bird photo (shown in figure 1):
python3 examples/classify_image.py \
--model test_data/mobilenet_v2_1.0_224_inat_bird_quant_edgetpu.tflite \
--labels test_data/inat_bird_labels.txt \
--input test_data/parrot.jpg

python3 detect_image.py \
  --model all_models/ssd_mobilenet_v2_coco_quant_postprocess_edgetpu.tflite \
  --labels all_models/coco_labels.txt \
  --input all_models/grace_hopper.bmp \
  --output all_models/grace_hopper_processed.bmp


Edge TPU Object Tracker Example
Installation
1. First, be sure you have completed the setup instructions for your Coral device. If it's been a while, repeat to be sure you have the latest software.
Importantly, you should have the latest TensorFlow Lite runtime installed (as per the Python quickstart).
2. Clone this Git repo onto your computer:
mkdir google-coral && cd google-coral
git clone https://github.com/google-coral/example-object-tracker.git
cd example-object-tracker/
3. Download the models:
sh download_models.sh
These models will be downloaded to a new folder models.
Models
For the demos in this repository you can change the model and the labels file by using the flags flags --model and --labels. Be sure to use the models labeled _edgetpu, as those are compiled for the accelerator - otherwise the model will run on the CPU and be much slower.
For detection you need to select one of the SSD detection models and its corresponding labels file:
mobilenet_ssd_v2_coco_quant_postprocess_edgetpu.tflite, coco_labels.txt

Edge TPU simple camera examples
1. First, be sure you have completed the setup instructions for your Coral device. If it's been a while, repeat to be sure you have the latest software.
Importantly, you should have the latest TensorFlow Lite runtime installed (as per the Python quickstart).

2. Clone this Git repo onto your computer:
mkdir google-coral && cd google-coral
git clone https://github.com/google-coral/examples-camera.git --depth 1
3. Download the models:
cd examples-camera
sh download_models.sh
These canned models will be downloaded and extracted to a new folder all_models.

Posenet 姿態識別
安裝posenet
Coral PoseNet
Pose estimation refers to computer vision techniques that detect human figures in images and video, so that one could determine, for example, where someone’s elbow, shoulder or foot show up in an image. PoseNet does not recognize who is in an image, it is simply estimating where key body joints are.

This repo contains a set of PoseNet models that are quantized and optimized for use on Coral's Edge TPU, together with some example code to shows how to run it on a camera stream.

Why PoseNet ?

Reference https://github.com/google-coral/project-posenet
https://hackmd.io/@0p3Xnj8xQ66lEl0EHA_2RQ/H1dgMOx1L
git clone https://github.com/google-coral/project-posenet
sh install_requirements.sh
python3 simple_pose.py

TensorFlow-Lite-Object-Detection-on-Raspberry-Pi
Reference https://github.com/JerryKurata/TFlite-object-detection/tree/main

TensorFlow Lite Python image classification example with Raspberry Pi.
Plug in your Coral USB Accelerator into one of the USB ports on the Raspberry Pi. If you're using a Pi 4, make sure to plug it in to one of the blue USB 3.0 ports.
Speed up TensorFlow Lite Inferencing with Coral USB Accelerator
https://gpiocc.github.io/learn/raspberrypi/ml/2020/06/27/martin-ku-speed-up-tensorflow-lite-inferencing-with-coral-usb-accelerator.html
python3 classify.py \
  --model ~/efficientnet_lite0_edgetpu.tflite \
  --labels ~/ai/labels.txt

Reference wget www.dropbox.com/s/i8mdgys2wav7ooa/coral-live-object-detector-v2.py

YouTube Demo:


學習Python程式語言的工具


Anaconda是一個開源[5]的Python和R語言的發行版本,用於計算科學(資料科學、機器學習、大數據處理和預測分析),Anaconda致力於簡化軟體套件管理系統和部署。Anaconda透過Conda[6]進行軟體套件管理,並擁有許多適用於Windows、Linux和MacOS的資料科學軟體套件。


PyCharm是一個用於電腦編程的整合式開發環境(IDE),主要用於Python語言開發,由捷克公司JetBrains開發,提供代碼分析、圖形化除錯器,整合測試器、整合版本控制系統,並支援使用Django進行網頁開發。
PyCharm是一個跨平台開發環境,擁有Microsoft Windows、macOS和Linux版本。社群版在Apache授權條款下釋出,另外還有專業版在專用授權條款下釋出,其擁有許多額外功能,比如Web開發、Python We框架、Python剖析器、遠端開發、支援資料庫與SQL等更多進階功能。


Qt 是一個跨平台的 GUI 框架,支援 Windows、MacOS、Linux 等各大作業系統,其主要使用的程式語言是 C++,但想要在 Windows 上開發 C++ ⋯⋯摁想到要安裝 Compiler 我就頭痛,於是說到跨平台、最容易安裝、又最好入門的程式語言就是 Python 了,所以 Qt 同時推出了一個 Qt for Python,讓大家可以開心的用 Python 來編寫 GUI 應用程式。


2024年1月21日 星期日

以 scp 指令複製檔案與目錄

Purpose:
這裡介紹如何在 Linux 系統上以 scp 指令複製檔案與目錄,並提供一些參考範例。
若要在不同的 Linux 主機之間複製檔案,最常用的方法就是使用 scp 指令,它可以透過 SSH 安全加密傳輸的方式,將本地端的檔案或目錄複製到遠端,或是將遠端的資料複製到本地端

Fundamental:
SCP(安全複製協定)是一個超好用的SSH命令列實用程式,不僅允許您在兩台電腦之間互傳檔案,還可以在檔案傳輸過程中進行加密,通常可作為遠端備份使用。

SCP檔案傳輸的命令列語法

scp [OPTION] [user@]SRC_HOST:]file1 [user@]DEST_HOST:]file2

OPTION:代表scp選項,例如密碼、SSH配置、SSH埠、限制、遞迴複製等。
[user@]SRC_HOST:]file1:您想要複製的原始檔案或者目錄。
[user@]DEST_HOST:]file2:儲存已復製的原始檔案或目錄的特定路徑。

1. 執行以下命令列即可將本機電腦中的檔案複製到遠端電腦:
scp file.txt remote_username@10.10.0.2:/remote/directory
file.txt - 想要傳輸的目標檔案的名稱
Remote_username - 遠端裝置的使用者名稱
10.10.0.2 - 將它替換為IP位址
/remote/directory - 想要將檔案複製到的目標位置(如果未提供遠端目錄,則檔案會被複製到遠端使用者的主目錄)

2. 執行以下命令列即可將遠端電腦中的檔案複製到本機電腦:
scp remote_username@10.10.0.2:/remote/file.txt /local/directory
輸入使用者名稱與密碼即可開啟傳輸檔案。

3. 若要複製整個目錄以及其下的所有檔案,則加上 -r 參數:
# 複製目錄
scp -r /path/folder1 myuser@192.168.0.1:/path/folder2

4. 保留檔案時間與權限
若要讓檔案在複製之後,還可保留原本的修改時間、存取時間與權限,可以加上 -p 參數:
# 保留檔案時間與權限
scp -p /path/file1 myuser@192.168.0.1:/path/file2

5.資料壓縮
若要將資料壓縮之後再傳送,減少網路頻寬的使用量,可以加上 -C 參數:
# 資料壓縮
scp -C /path/file1 myuser@192.168.0.1:/path/file2

6. file commands
mkdir 建立目錄(mkdir 指令)
rm 刪除檔案
rmdir 刪除或移除目錄(rmdir 指令)
檔案的權限字元為:『-rwxrwxrwx』, 這九個權限是三個三個一組的!其中,我們可以使用數字來代表各個權限,各權限的分數對照表如下:
r:4
w:2
x:1
每種身份(owner/group/others)各自的三個權限(r/w/x)分數是需要累加的,例如當權限為: [-rwxrwx---] 分數則是:
owner = rwx = 4+2+1 = 7
group = rwx = 4+2+1 = 7
others= --- = 0+0+0 = 0

 chmod 777 test

-rw-r--r--  1 mendel mendel 2355143 Jun  6  2019 project-teachable.tgz
drwxrwxrwx  2 mendel mendel    4096 Jan 21 01:36 test

7. cp [option] [source] [destination]

The source is the file or directory you want to copy, while the destination represents the location where the copy should be placed. The destination can be a directory path or a new filename if the file needs to be renamed.

Use the listed cp command options below to specify different behaviors:

OPTION DESCRIPTION
-v Displays additional information about the copying process.
-p Forces the system to preserve source file attributes (modification time, access time, user ID (UID), group ID (GID), file flags, file mode, access control lists (ACLs), and extended attributes (EAs)).
-f If the destination file/directory exists, replaces it with the source.
-i Prompts for confirmation before overwriting a file.
-r Copies all files in a directory.
-u Replaces files only if they satisfy the update condition. For example, when the destination file does not exist or when the source file is newer than the destination file.


2024年1月19日 星期五

Coral Dev Board Object Detection Edge TPU

Purpose:
利用Coral Dev Board的TPU(Tensor Processing Unit)與USB Camera來做一些影像識別的專案.
Use Coral Dev Board's TPU (Tensor Processing Unit) and USB Camera to do some image recognition projects.
Coral Dev Board
The Coral Dev Board is a single-board computer that contains an Edge TPU coprocessor. It's ideal for prototyping new projects that demand fast on-device inferencing for machine learning models.
該開發板具有用於專用串行控制臺介面的Micro-USB端口,可用於監視系統並監督將OS(Debian Linux的定制版本,稱為Mendel)刷新到板載存儲中。還有第二個USB-C端口,用於將開發板連接到運行Linux的電腦。用戶應該使用SSH協議登錄開發板以正常使用。
預設帳號密碼(mendel / mendel)
擁有 AI 運算能力的 TPU(Tensor Processing Unit)


Fundamental:
TPU 在處理矩陣運算上採用脈動陣列(Systolic Array)的方式;比起 GPU 中每個 ALU 都各做各的,在 TPU 裡面的資料會在各個 ALU 之間穿梭,每個 ALU 專門負責一部分,共同完成任務。這麼做有兩個好處,一是每個人負擔的工作量更少,代表每個 ALU 的體積可以再縮小;二是半成品傳遞的過程可以直接在 ALU 之間進行,不再需要把半成品借放在暫存區再拿出來,大幅減少了儲存與讀取的時間。
在這樣的架構下,比起只能塞進約 4000 個核心的 GPU,TPU 可以塞進 128*128 共 1.6 萬個核心,加上每個核心負擔的工作量更小,運算速度也就更快、耗電量更低。
eMMC (Embedded MultiMediaCard) 是嵌入式多媒體卡的縮寫

設定網路工具:
nmtui 直接連到Wifi
顯示網路的狀態:
nmcli connection show
IP查詢:
ip addr show
nmcli device show
video1資訊:
v4l2-ctl --list-formats-ext --device /dev/video1

Reference Web site:
https://coral.ai/products/
https://coral.ai/docs/dev-board/get-started/
https://coral.ai/docs/dev-board/datasheet/#features

YouTube Demo:


2024年1月4日 星期四

CPU SN software lock

C#開發軟體利用每台PC或是NB的唯一CPU序號特點來做為控管測試軟體的一種軟體鎖.
1. 專案請先加入參考 System.Management
2. 透過 ManagementObjectSearcher 查詢CPU serial number.
private void button2_Click(object sender, EventArgs e)
{
      // 透過 ManagementObjectSearcher 類別用類似 SQL 的語法查詢
      ManagementObjectSearcher wmiSearcher
        = new ManagementObjectSearcher("SELECT * FROM Win32_Processor");
      int i = 0;
       // 使用 ManagementObjectSearcher 的 Get 方法取得所有集合
      foreach (ManagementObject obj in wmiSearcher.Get())
      {
          // 取得CPU 序號
           //Console.WriteLine("CPU{0} ID:\t{1}", i++, obj["ProcessorId"].ToString());
           CommonData.WriteMessage(CommonData.richtextbox, "CPU{0} ID:\t{1}-"+                                         (i++).ToString()+" - ", obj["ProcessorId"].ToString(), Color.Blue, Color.Green);
      }
}
執行畫面


2024年1月3日 星期三

ESP32 Grbl Controller

Purpose:
利用在網路上分享的Git連結 Grbl_ESP32 code upload 到自己的ESP32, 來進行將G 代碼從配備 USB 連接埠的電腦傳輸到數控機床(例如3D 列印機或雷射切割機)的步進馬達控制器.

Use the Git link shared on the Internet to upload the Grbl_ESP32 code to your own ESP32 to transfer the G-code from a computer equipped with a USB port to the stepper motor controller of a CNC machine tool (such as a 3D printer or laser cutting machine) .

Circuit:
Y axis set and Z axis set are the same method


#define MACHINE_NAME            "ESP32_V4"

#define X_STEP_PIN              GPIO_NUM_12
#define X_DIRECTION_PIN         GPIO_NUM_14
#define Y_STEP_PIN              GPIO_NUM_26
#define Y_DIRECTION_PIN         GPIO_NUM_15
#define Z_STEP_PIN              GPIO_NUM_27
#define Z_DIRECTION_PIN         GPIO_NUM_33

#define X_LIMIT_PIN             GPIO_NUM_17
#define Y_LIMIT_PIN             GPIO_NUM_4
#define Z_LIMIT_PIN             GPIO_NUM_16


// OK to comment out to use pin for other features
#define STEPPERS_DISABLE_PIN    GPIO_NUM_13

#define SPINDLE_TYPE            SpindleType::PWM
#define SPINDLE_OUTPUT_PIN      GPIO_NUM_2   // labeled SpinPWM
#define SPINDLE_ENABLE_PIN      GPIO_NUM_22  // labeled SpinEnbl

#define COOLANT_MIST_PIN        GPIO_NUM_21  // labeled Mist
#define COOLANT_FLOOD_PIN       GPIO_NUM_25  // labeled Flood
#define PROBE_PIN               GPIO_NUM_32  // labeled Probe


Fundamental:

在之前的文章中Arduino應用之3D印表機改裝成繪圖機是利用 Arduino Mega2560自己去寫控制步進馬達的部分, 最近看網路文章發現有神人把Grbl(Grbl是一款針對Arduino/AVR328晶片的嵌入式G代碼編譯和運動控制器。)放進ESP32裡面, 所以就來試試!! 網路Git連結Grbl_ESP32, 詳細說明如下連結Grbl_Esp32 Wiki介紹得很清楚!!

圖一:運作流程圖
Inkscape
Inkscape is professional quality vector graphics software which runs on Linux, Mac OS X and Windows desktop computers.

Universal Gcode Sender

A free and full featured gcode platform used for interfacing with advanced CNC controllers like GRBL , TinyG, g2core and Smoothieware. Universal Gcode Sender is a self-contained Java application which includes all external dependencies and can be used on most computers running Windows, MacOSX or Linux.
圖二:UGS 操作畫面

Reference the previous article link on blog:
ESP32 control stepper motor
ESP32 3-axis controller
三軸辨識系統-馬達篇


ESP32 Code:
https://github.com/bdring/Grbl_Esp32


YouTube Demo: